From a 2015 guitar take to a new song
In 2015 I recorded a one-minute guitar theme: acoustic, capo on the first fret, one take. It became the anthem of Life2Film, my service that cut people’s clips into a film on the beat of a song (project-life2film). This is the promo film it played under:
Ten years later I gave the same recording to Suno as a starting point and got a full demo back, with drums, bass, synths, strings and voices. The song is called «Выше и дальше» (“Higher and further”).
A demo is not a song, though. It plays my theme in its own way, and the guitar that started it is gone. So I took it back, part by part, in REAPER, with Claude as the assistant: it measured, wrote the project files and moved the knobs, and I listened and said what was wrong. This page is the path, with the numbers, and the short version of how I would do it next time.
The teaser below is a day on the Coast Starlight train through Oregon. I worked on this track on that train, and Claude cut the video from my footage with the same kind of skills (creative-video-agent-cut).
Here is the whole journey in one player, the first 48 seconds of the song three times: the demo Suno made from my guitar, my first try at replacing it, and where it stands now.
B still carries Suno’s voice, strings and percussion; C has no vocals yet. So far it is simple, but it is already what it needs to be.
And the guitar itself. A is the 2015 recording, B is the same 30 seconds replayed from the notes the decoder found, on a simple plucked-string synth:
What you need
- REAPER. Any DAW works, but REAPER keeps the project as a text file, so the assistant can write a whole arrangement into it instead of clicking.
- SuperDuper DSP, free: Piano, Wave, Kubyz and Sampler for the parts; EQ, Compressor and Soothe for the mix. Every one of them reports its sound to a shared meter, so the assistant can see who covers whom.
- The demo’s stems. Suno exports twelve (vocals, drums, bass, guitar, keys, strings, synth…).
- Free tools the assistant runs for you: Basic Pitch (audio to notes), Demucs (stem split), Rubber Band (time-stretch).
The path
0. The first try: straight from the stems to MIDI
My first idea was the direct one: split the demo into its 12 stems, turn every stem into MIDI and play that MIDI on my own instruments. One night of it produced a full rebuild that matched the demo’s spectrum within 0.6 dB per section (take B above) and still was not the song:
- the bass came out as 10 to 24 notes per bar, re-attacks and harmonics read as notes. It only worked once the rhythm came from the bass stem’s onsets and the pitch from the chord of the bar;
- the drums, transcribed by frequency band, were noise: the snare smeared over all 16 slots, hats everywhere, 195 kicks in 98 bars. They became a hand-written pattern;
- everything sat on the demo’s apparent tempo, 90.91 BPM, which turned out to be the kick, not the beat (step 3), and for most of the night every written part played one bar early, because the bar count started from the wrong downbeat.
Usually I work with my sound engineer, Andrey Renev (@andreyrenev on Telegram): he assesses my Suno draft and sets the base, the grid and the scale; I add the style, the effects and the voice; then he mixes. This time he set the demo up in REAPER at 68 BPM with block chords on a piano, one per bar: Ab | Eb | Fm | Db. Later the measurements showed that this is exactly the grid and the circle the demo’s harmony moves on, and his chords now play in the song as a pad in the choruses, the break and the final (his voicing, an octave up, so it stays clear of the guitar and the bass).
The process is getting more parallel, and for speed I aim to run the whole cycle myself. I know this melody and how it is supposed to sound, so I went back to the guitar it came from.
1. Hear what the guitar really plays
First check that the take is really solo: a stem split put the guitar at −20 dB and everything else below −42 dB. Then the notes. The usual transcribers gave me notes but not the pattern: which string, which finger, where the circle starts. A clip of me playing it (Instagram) did not help either: the picking hand is out of frame.
So the assistant built a small decoder on top of Basic Pitch that knows a guitar has six strings, one note per string, and a capo. On a public guitar dataset (GuitarSet, players it was not tuned on) it finds notes about as well as Basic Pitch (F1 0.63 to 0.78) and names the string right 55 to 79 % of the time. On my 2015 take it found the whole thing:
- the thumb plays the 6th string, frets 3, 2, 0: Ab, G, F;
- the fingers play [Ab3 + C4] Eb3 Ab3 Eb3 on every beat;
- the circle is three bars, Ab | Eb/G | Fm. That is why I could never tell whether it was “in 3 or in 4”.
Dead end worth knowing: the first decode looked like noise. Basic Pitch cuts audio into 2-second windows, and each window starts 10.24 ms earlier than the simple formula says. Reading its output naively drifts 0.3 s a minute. Fixing that one line doubled the precision (0.14 → 0.30) before any tuning. When a transcription looks random, check its timing before you blame the model.
2. Make it a steady base
The first REAPER project followed every beat of the recording. Accurate, and it felt wrong; my note was “it stumbles”. Bars of different widths are what a human plays, not what you build on.
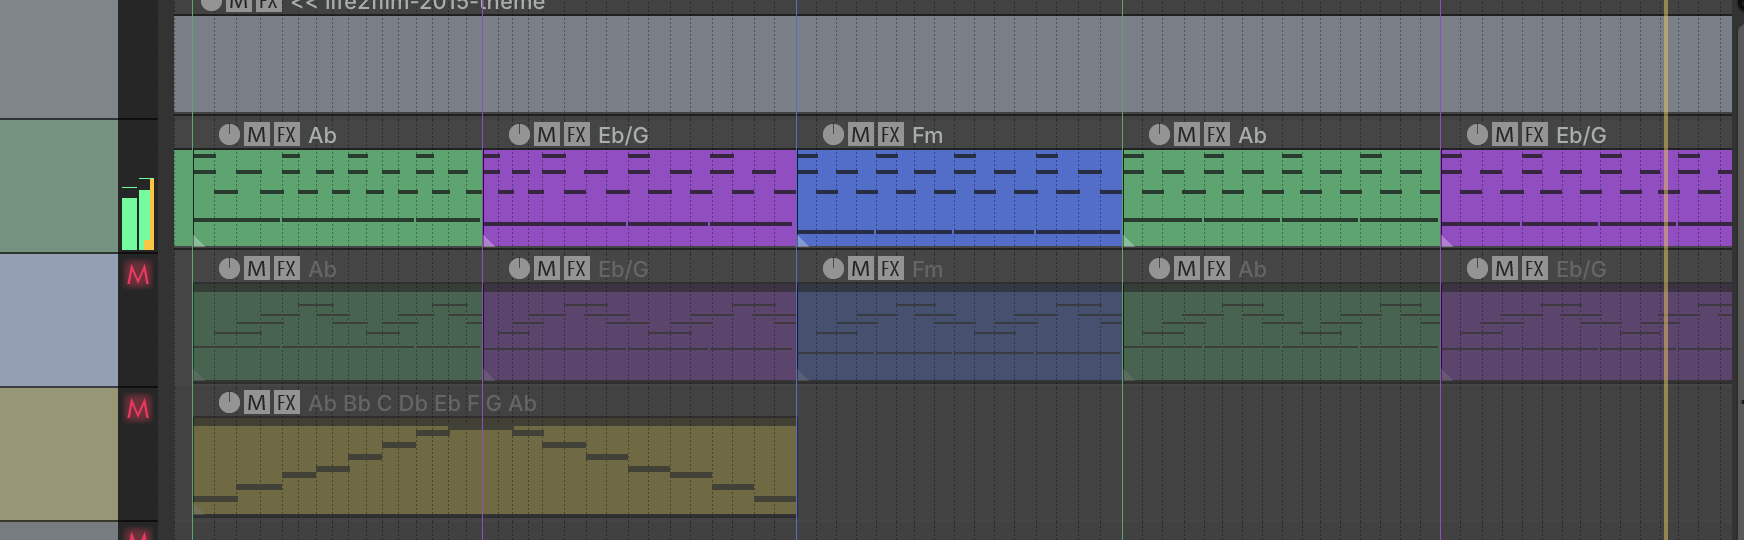
The base became a steady 72 BPM with every note the same length and velocity, on the SuperDuper Piano. The recording was stretched bar by bar onto that grid for A/B, so I could hear that nothing was lost.
3. Find the demo’s real grid before laying anything under it
Second dead end: I put the guitar under the stems at the drum tempo, 90.91 BPM, and the chords ran too fast.
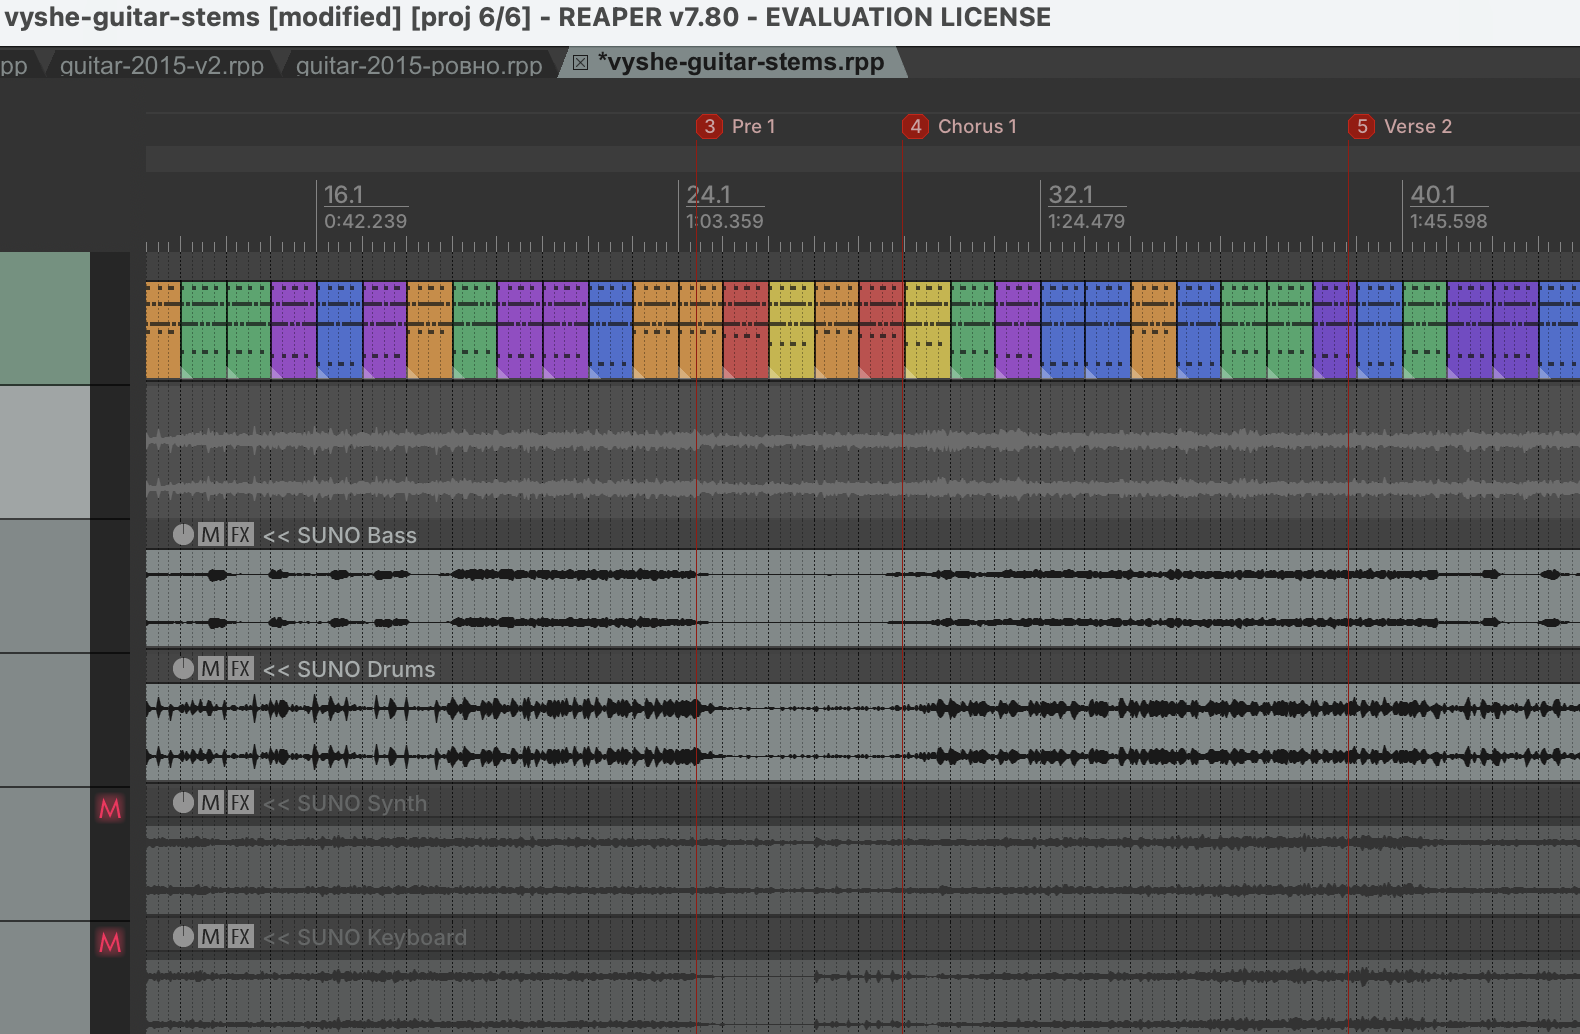
Measured, the harmony moves every 3.527 s, which is 68.05 BPM, the tempo Andrey had set. The 90.91 came from the kick repeating every 0.66 s, three sixteenths, not from the beat. And the demo’s drums turned out to be tight on their own grid (snare and hats within 12 to 17 ms of it), so the whole project now takes its grid from the drum stem, one tempo point per beat, written straight into the project file.
An AI demo can carry its drums and its chords on different grids. Measure first.
4. Split the guitar into roles
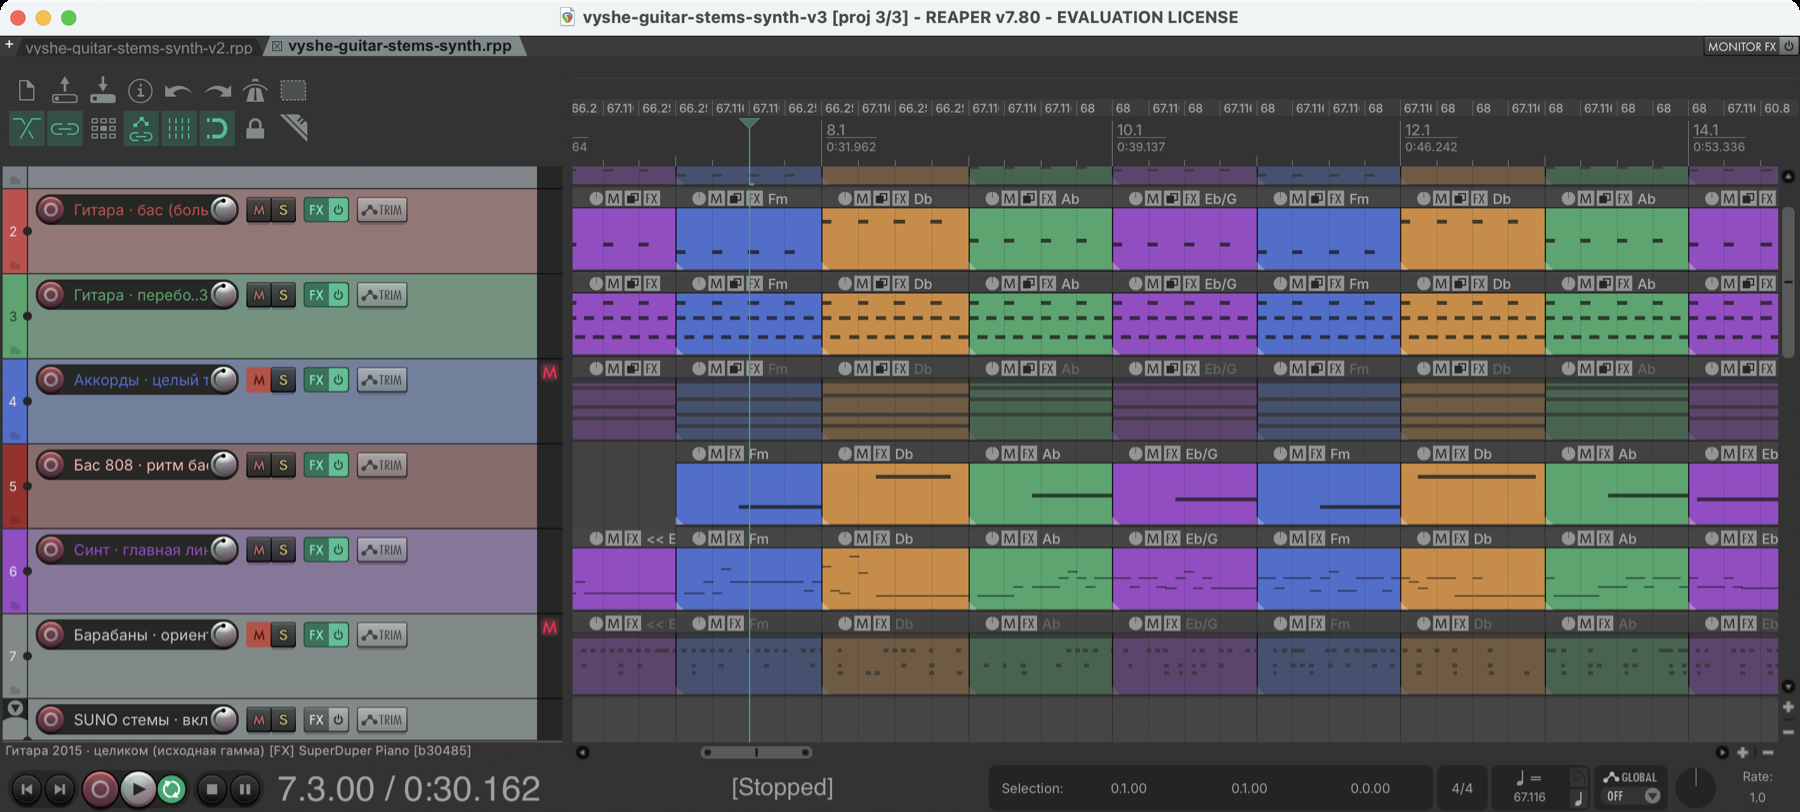
One line of notes is hard to reuse. Split by job, it becomes a toolkit:
- bass: the root on every beat (what the thumb does);
- picking: [Ab3 + C4] Eb3 Ab3 Eb3;
- whole-bar chords: muted, ready for pads;
- the full original line: muted, as a reference;
- 808: the demo’s bass rhythm, with the root of each bar;
- synth: the demo’s synth line, split into low (verses) and high (choruses).
Chords the guitar never plays (Db, Bbm in the pre-chorus) come from the demo’s own harmony.
5. Drums hit by hit, then simpler
Every hit of the demo’s drum stem was found and labelled (189 kicks, 292 snares, 323 hats), and each one matched to the closest one-shot in a sample library by spectrum (kick 0.906 cosine). Then every hit was snapped to the drum grid and cut at the next one, so the tails stop piling up.
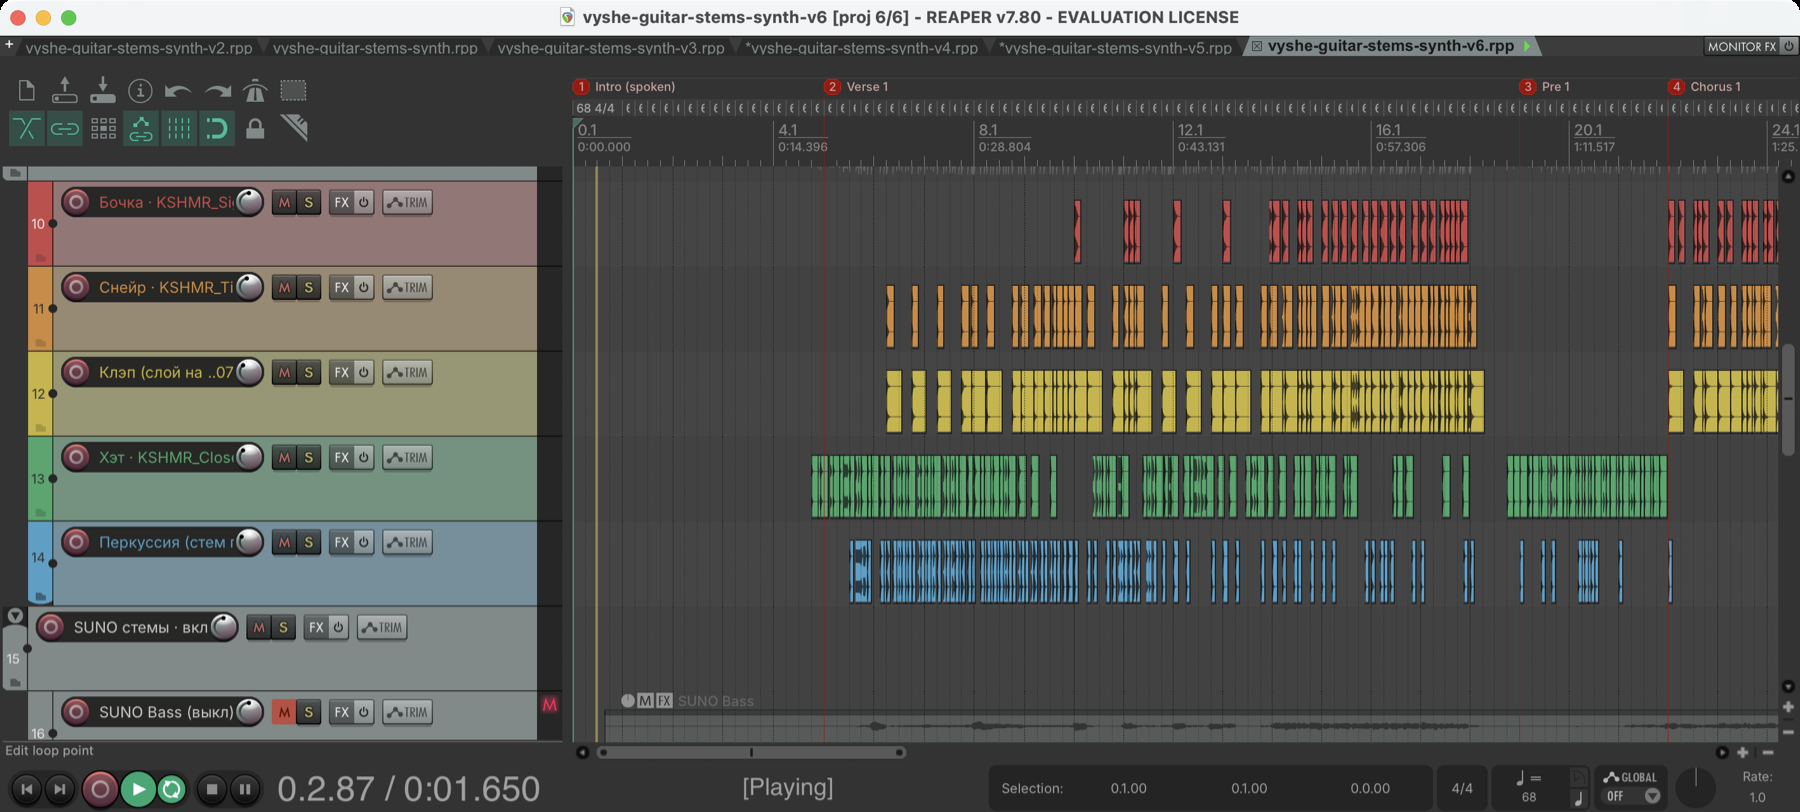
It sounded like the demo and I did not like it: too many elements, no groove. The kit became one simple pattern per part, with hits made from a kubyz, and then my own kubyz takes from older songs: one slice of a 2026 take, cut into its four strokes and placed on the sixteenths in the break and the bridge.
6. Mark the parts by who sings
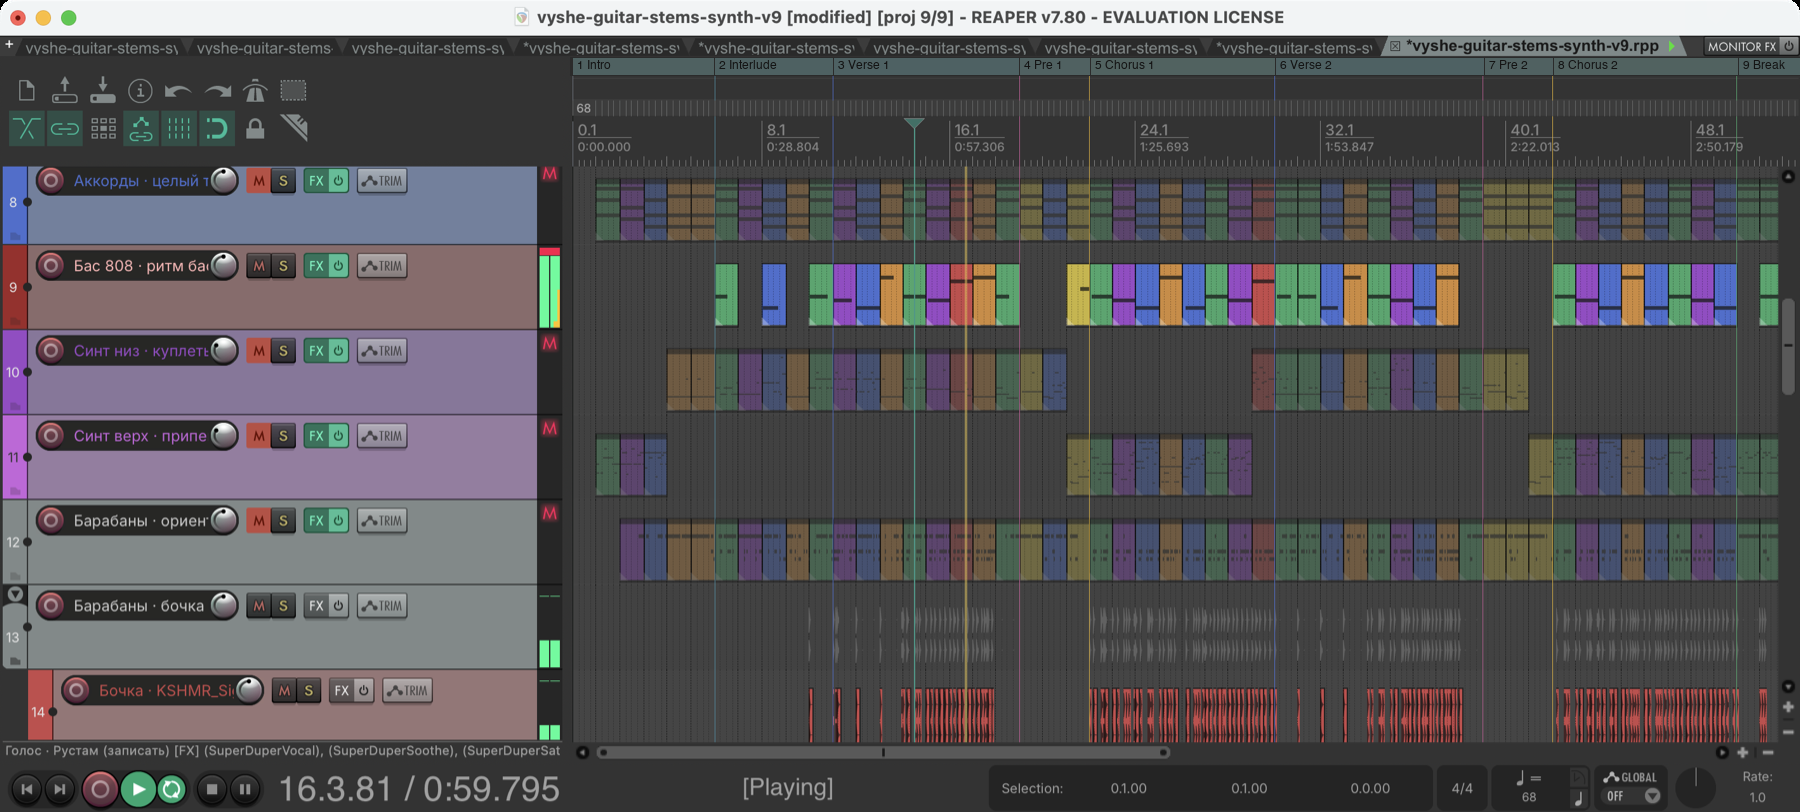
The assistant read the pitch of the vocal stems line by line and the level of every stem per part, and drew the parts as regions: a spoken intro, an instrumental interlude with strings and a pipe, verses, pre-choruses, choruses, a break, a short dialogue, a bridge, the final and the outro. The song has three voices to record: mine, a second singer, and a “Bashkir spirit” in the bridge.
7. Give the start back to the real guitar
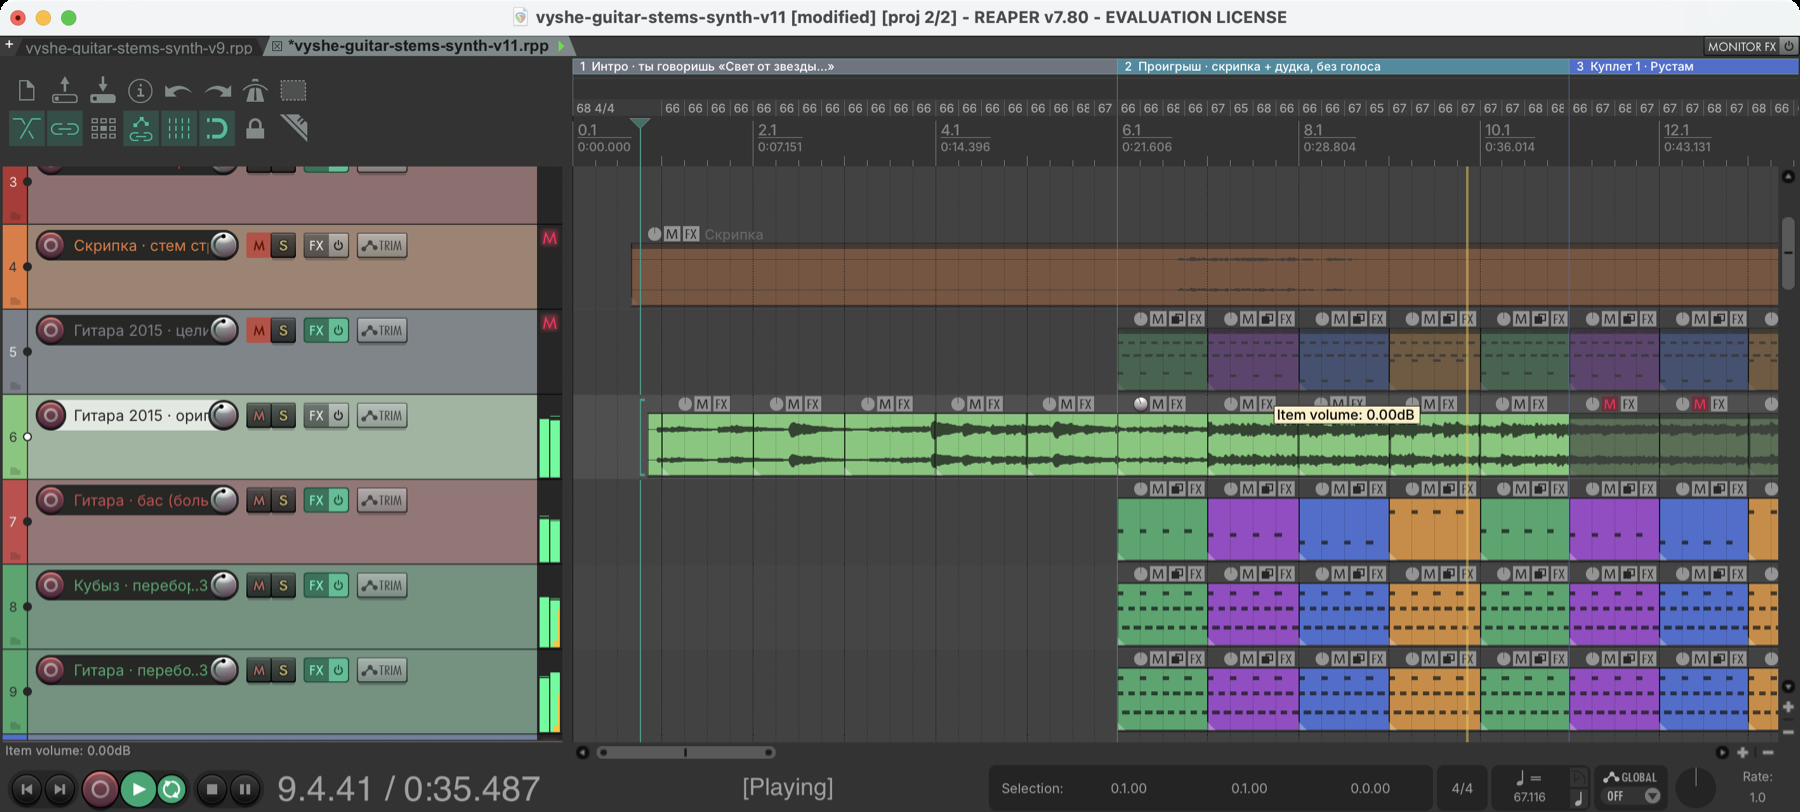
The 2015 take opens with a pickup note and five bars before the picking starts. Those five bars are now the intro of the song, each stretched to its bar (rate 0.89 to 0.92, pitch kept). The interlude starts with the very bar that followed them in 2015, so the seam is the real one, and that is where the bass, the synth and the hats come in.
8. A basic mix, by measurement
The shared meter lets the assistant play one chorus on loop and list which tracks cover each other in which band. The rules it followed:
- Balance against the demo’s own stems. The demo’s vocal sits in both mixes, so it is the anchor. My kick was 11 dB above it, the picking 3 dB above; the demo has its drums 3 dB above the vocal and its guitars 3 dB below. Faders: kick −8, picking −6, synth +7, 808 +2.
- Kick ducks the bass by up to 5 dB on every hit (a compressor keyed from the kick).
- The synth yields to the voice only while it sings (Soothe keyed from the vocal, 7 dB): the clash at 3.6 to 4.4 kHz went from 61 % of the time to 0, and the synth lost only 1.9 dB on average.
- One owner per band. The surprise: my “808” was a kubyz. Its pitch lives in a formant at 320 Hz, its fundamental is 28 dB lower. Cutting it with EQ only made it equal to the guitar there. The fix was at the source (formant mix 1 → 0.5, brightness 1 → 0.6), and then the bands were split by job: the kubyz-bass keeps 270 to 410 Hz, the picking keeps its notes at 140 to 260 Hz.
The voice’s band (1.9 to 2.3 kHz) is now free: guitar under the vocal went from 60 % to 0.
9. The chain on every track, and the plugins doing the work
Every track gets the same order of plugins. Only the numbers change:
instrument → EQ → Compressor (keyed from the kick) → Space → Soothe (keyed from the vocal)
- EQ right after the instrument. It starts flat, so the shared meter hears the track, and then takes the cuts the measurements ask for.
- Compressor next, keyed from the kick. In REAPER: the kick track sends to channels 3/4 of the target track (post-fader), the target track gets 4 channels, and the compressor’s side-chain pins read 3/4. Threshold sits above the target’s own peaks (−14 dB here, the 808 peaks at −17 to −20), so only the kick can trigger it; Ratio 10, and the depth comes from Range.
- Space before the last step. It writes every output channel, so anything keyed from channels 3/4 must come before it.
- Soothe last, keyed from the vocal, so a part steps aside only while the voice sings.
The SuperDuper plugins in the song and what each one does there:
| plugin | on | job |
|---|---|---|
| Piano | guitar bass, picking | plays the decoded guitar lines (Salamander grand) |
| Wave | picking layer, synth low and high | wavetable synth: the picking’s texture, the synth lines |
| Kubyz | the “808” | the kubyz as a bass voice (formant mix 0.5, brightness 0.6) |
| Pad | Andrey’s chords, the build into the chorus | “Slow Strings”, his voicing an octave up |
| Wind | riser before each chorus | “Howling Gale” |
| EQ | every track | cuts: 808 −4 dB at 200 Hz, picking −3 dB at 300 Hz, pad −3 dB at 700 Hz and HP 250 Hz |
| Compressor | 808, both synths, pad, kubyz layer | ducks under the kick: 808 5 dB, synth high 4, synth low 3, pad 3 (slower release, so it breathes), kubyz layer 2 |
| Soothe | synth high, pad | yields to the vocal only while it sings: 7 dB and 5 dB |
| Space | pad, kubyz layers, risers | depth and side: pad a little back and wide, the kubyz groove right, the kubyz picking left |
The guitar picking does not duck under the kick: it is the song.
10. Building into the chorus
In the demo the pre-chorus builds and ours just played the guitar, even and flat. Measured first: the demo’s guitar gets brighter every bar (spectral centre 1610 → 1870 Hz), a swell in its “other” stem rises 18 dB over the pre-chorus (30 dB in the last bar of the second one), and the guitar steps back 4 to 5 dB on the chorus downbeat. Ours has the same shape:
- a string swell: the pre-chorus chords on Andrey’s pad, fading in from silence, running into the same pad in the chorus;
- a wind riser on the last two bars;
- a kubyz roll made of my four strokes, accelerating from quarters to 32nds, rising from −18 to 0 dB while its high-pass opens from 2.5 kHz to 400 Hz;
- Space moves both from far (distance 0.9) to close (0) by the downbeat;
- a sixteenth of silence before the chorus: every build layer stops just short of the downbeat.
The tambourine in the choruses went the same way as the drums before it: the loop’s accents were measured (off-beat eighths loudest, the other sixteenths 8 to 14 dB lower) and replayed with my kubyz strokes.
11. Why the bass looked small, and two masters
Side by side in a DJ app with commercial tracks, ours looked thin: short red strokes with gaps between them. It was not the loudness. DJ apps level-match, and “Lose Yourself” at −15.4 LUFS looked bigger than our render at −8.6 LUFS. What the app draws in red is the share of energy under 120 Hz: ours had 20 % of the chorus there, the demo 52 %, “Lose Yourself” 58 %, a current trap hit 65 %.
Three things had cut it:
- the master limiter was pushed 8 dB and shaved every kick and bass peak (dynamics range 2.6);
- the bass is a kubyz, whose pitch lives in a formant around 320 Hz with the fundamental 28 dB lower;
- that bass had a 0.5 s attack, so under every kick there was almost no bass.
The fixes: a sub layer playing the same notes (Wave “808 Sub”, tape saturation before a 200 Hz low-pass so it is still heard on a phone), the bass attack at 0.01 s, the sub ducking only 3 dB under the kick so it fills the gaps, the limiter backed off, and a second, low-only kick (in F, peak at 44 Hz) under the punchy one. The share went 20 → 43 → 53 → 65 %.
That leaves two masters: one for streaming at −11.2 LUFS with the dynamics kept (range 8.8), and a club one at −9.1 LUFS (an “inflate” saturator before the limiter, ceiling −1.5 dB so the mp3 stays under zero). Louder than that is clipping: the trap hit measures +2.3 dB over full scale. And the top came from a new bright hi-hat layer: kubyz sounds have almost nothing above 5 kHz.
How I would do it next time
- Start from the real recording, and check it is solo with a stem split.
- Decode the pattern, not just the notes: strings, fingers, the length of the circle. Replay the notes and A/B them against the take before trusting them.
- Build a steady base with equal notes. Keep the live take for A/B, not as the grid.
- Measure the demo’s grids before putting anything under it: harmony and drums separately. Take the project grid from whatever is tightest (here the drums).
- Split your part by role (bass, picking, chords, full line muted) so every layer can become a new instrument later.
- Replace one layer at a time while you listen, with the demo’s stem muted next to it for A/B.
- Simplify the drums before you perfect them. A copy of the demo’s kit is still the demo.
- Mark the parts by who sings, from the vocal stems, so the arrangement has a story.
- Bring your own sounds: takes from your earlier songs are what makes it yours.
- Mix by measurement: balance against the demo’s stems, sidechain the bass, duck under the voice only while it sings, and fix a clash in the source before you reach for EQ.
- Keep one chain order on every track, so any track can be read at a glance: instrument, EQ, kick side-chain, space, vocal duck.
- Measure the demo’s build before writing yours: which layer swells, by how many dB, and where it stops.
- Check the low-end share before the loudness: how much of the chorus sits under 120 Hz, against a reference in the same style.
What to ask the assistant
Here is my old guitar take and the stems of an AI song made from it. Find what my guitar plays (strings, the circle), make a steady REAPER base from it, measure the song’s real grid from its stems, and put my guitar under it split into bass, picking and chords.
Play the chorus on loop and tell me which tracks cover each other. Balance against the demo’s own stems, then fix the worst clash at its source.
What is still missing
Besides the vocals: a backbeat (nothing on 2 and 4 in the choruses yet), the violin, which in the demo plays in the interlude, the bridge and the final, the pipe line in the interlude, and the release master. Each is one more step of the same loop.
Related: project-superduper-dsp, creative-music-with-claude, creative-kubyz-speaks.